Optimising PowerPoint files
If you use images and other media in your PowerPoints, they can grow quite large. This post will show you how to optimise your PowerPoint files.
Very large PowerPoint files can be problematic for both you and your students because:
- They can take a long time to upload to Blackboard or Blackboard Collaborate
- They may be too large for Blackboard *Collaborate's 60MB limit
- Presenting on Collaborate may be very "laggy"
- They may take a long time to download for students
*It is recommended that PowerPoints are converted to PDF if being used in Blackboard Collaborate.
Also, as the PowerPoints are only intended for display on regular sized screens, most of the data e.g. in high resolution images, is not really needed.
Excess file sizes can be caused by inserting high resolution images e.g. from digital cameras, video or audio files.
Reducing image sizes
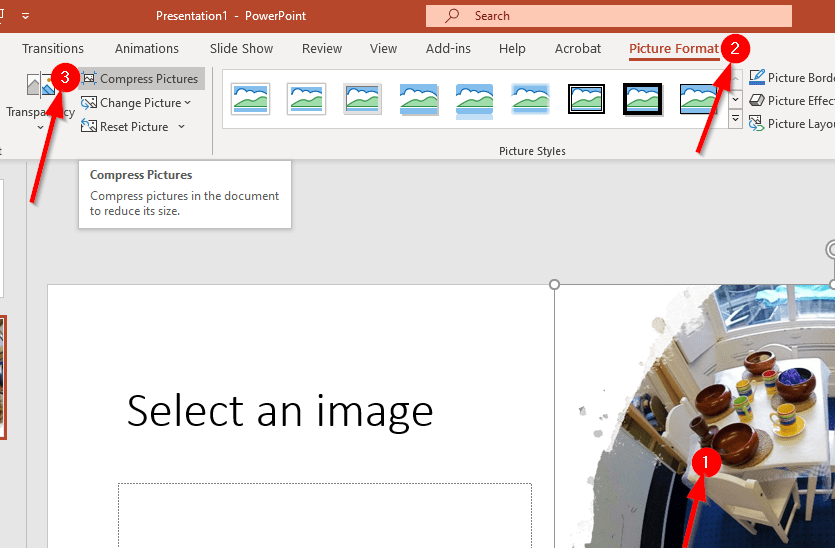
On Windows (assuming you have PowerPoint as part of Office 365)
- select any image in your PowerPoint
- Go to the Picture Format section of the toolbar
- Choose Compress Pictures
[ ]
]
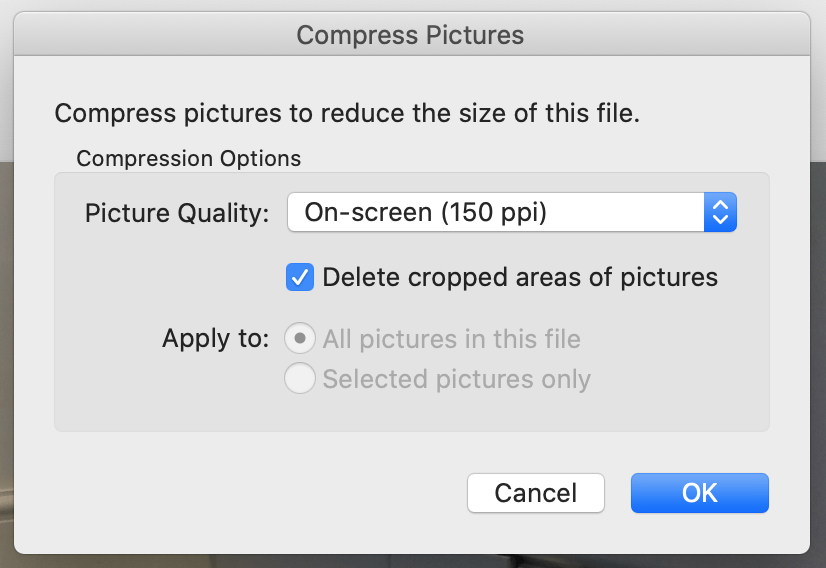
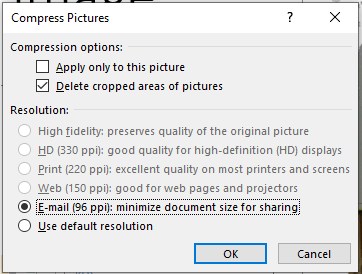
In the dialogue box:
- Untick Apply only to this picture
- Keep Delete cropped areas ticked
- Choose E-mail as the resolution
[ ]
]
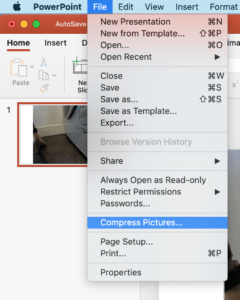
On a Mac, simply go to the File menu and choose Compress Pictures:
[ ]
]
And choose the same settings as below: